Open Access Labs:
- ASEC 121B
- The Library
Engineering Computer Labs:
- PMEC 142 OCEN Senior Design Lab
- PMEC 156 MARE Senior Design Lab
Teaching Computer Labs*:
- CLB 109, 111
- MAIN 213, 315
- PMEC 158, 242
*Teaching computer labs are not available at all times.
How to Install VMware Horizon Client to Access VDI
1. Go to https://desktop.tamug.edu.
2. Download the Horizon View Client. It is the option on the left side. There is also a MAC version available.
3. Follow the prompts to install the software.
4. We recommend rebooting after installing the software.
5. When it asks you to select or add a server, you will add the following server desktop.tamug.edu.
6. If you are off campus or in the residence halls, please VPN into campus first. Here is the link to the VPN instructions.
https://www.tamug.edu/it/services/connect-communicate-collaborate/VPN.html
7. Double click on the server and it will prompt you to log in. You will use your NetID and password.
Credentials:
Username: NetID
Password: NetID password
Domain: AUTH
You will be prompted for DUO authentication.
Once logged in, you will see different desktop options depending on what classes you are enrolled in.
For General Use, click on the Win10 Standard Desktop.
Engineering or GIS students, click on the Win10 Performance Desktop or Win 10 ArcGIS Desktop.
Common Issue:
If you get an error message that your account is disabled, please reset your NetID password by going to https://gateway.tamu.edu and logging in. Then select "Password Settings" and "Change Password". You can reuse the existing password most of the time. Wait a couple of minutes and try logging in again.
Special log in instructions for specific software on the Virtual System:
Automation Studio:
When you launch automation studio a box will appear.
When the box shows up:
1) Click license configuration
2) Click the license manager button and type in “usblicense”
3) Click return
4) When the program starts and asks to register software, click on later.
5) When it asks you to download a program, click on later.
AutoCAD or Autodesk Inventor:
If you open AutoCAD or Autodesk Inventor and it asks for a license.
1) click on multi user
2) in the server box type in "oceanserver".
3) click Done.
This has to be done once for every user.
SMS:
There may be a time when SMS does not know where to get the license.
Click on Register until it asks you for the source of the license.
Click on Hardware lock.
Click on Next
Then for Network hardware Lock server name, type in "usblicense"
Click on the button that says Apply lock code.
Once it generates a code, click on done.
SPE / Hecsalv Update Issue:
Occasionally you may end up with a pop up box looking for updates.
You DO NOT need any updates!
At the bottom of the box is a button that will let you postpone updates until later.
Once you click there, it will ask the frequency of update checks.
Click on Quarterly.
This will tell it to only check once every 3 months.
Win10 Standard
- 7-Zip
- Adobe Acrobat Reader DC
- Anaconda Python
- CargoMax
- DNA Master
- Ecopath with Ecosim
- Endnote X9
- EstimateS
- FiSAT II
- Fishery Analysis and Modeling Simulator
- G*Power
- Google Earth Pro
- JetBrains
- MarvinSketch - ChemAxon
- Microfish
- Microsoft Office
- Notepad ++
- Past
- Populus
- Project Pro 2016
- Pycharm
- R
- R Studio
- Tinn-R
- Visio 2016
- VMWare Horizon Client
- ArcGIS (If enrolled in GIS Class)
- ArcGIS Pro (If enrolled in GIS Class)
- AutoDesk AutoCAD
- AutoDesk Inventor
- Automation Studio
- Computer Aided Thermodynamic Tables (CATT3)
- Hecsalv Ship Project Editor (SPE)
- Hydroflow
- Labview (MultiSim Included)
- Matlab
- Microsoft Project
- OrcaFlex
- Pumpbase
- SMS
- Solid Works
- Adobe After Effects
- Adobe Audition
- Adobe Character Animator
- Adobe Creative Cloud
- Adobe Illustrator
- Adobe InDesign
- Adove Photoshop
- Adobe Premiere Pro
- Audacity
- Camtasia
- XnView Classic
- SPSS
CLB 109, 114 & Library public access
- Standard Installation, see the Win 10 Standard list above
- Anaconda3
- Ansys
- AutoDesk AutoCAD
- AutoDesk Inventor
- C-more Programming
- CargoMax
- Computer Aided Thermodynamic Tables (CATT3)
- Ecopath
- FiSatt II
- Hecsalv Ship Project Editor (SPE)
- Hydroflow
- Labview (MultiSim included)
- Marvin-Sketch
- MicroLab
- Microsoft Project
- OrcaFlex
- Pumpbase
- PyCharm
- R-Studio
- SESAM
- SMS
- Solid Works
- Tinn-R
- VMWare Horizon Client
Creating your ArcGIS Online Account
Go to https://tamu.maps.arcgis.com to create an Esri ArcGIS Online Account.
Click on the “Texas A&M NetID Login” and log in with your NetID and NetID Password
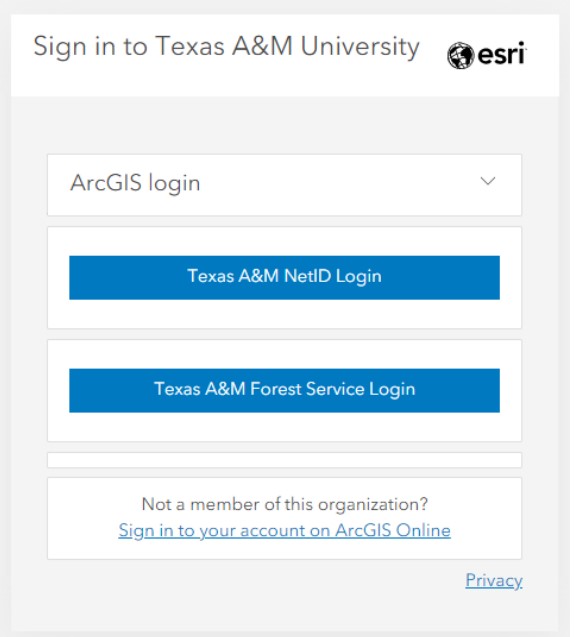
Your ESRI account is now created. You are logged into the Esri portal with access to the Esri applications.
Two methods of accessing ArcGIS Pro.
- Use the Installed ArcGIS Pro application on your local desktop
OR
- Use ArcGIS Online, by going to the same URL: https://tamu.maps.arcgis.com and
log in with your ArcGIS Online account you just created.
Desktop Access:
When you open ArcGIS Pro on your desktop, you will be prompted to select the “Tamu” logon as your ArcGIS Organization’s URL.
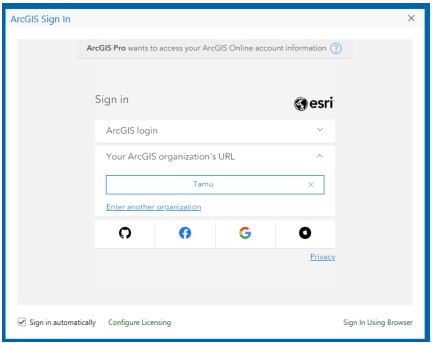
Click on “Tamu”
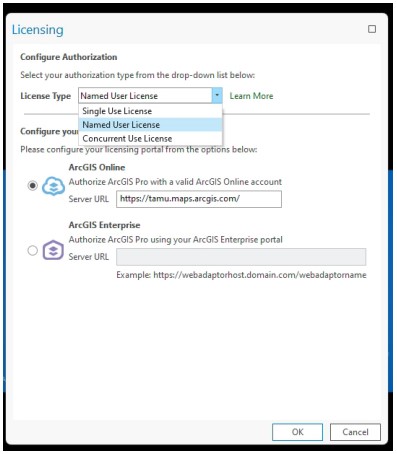
If a licensing window pops-up. Select “Named User License” beside “License Type”. Enter “https://tamu.maps.arcgis.com” in the “Server URL” section. Then Click OK.
Then click on the “Texas A&M NetID Login”
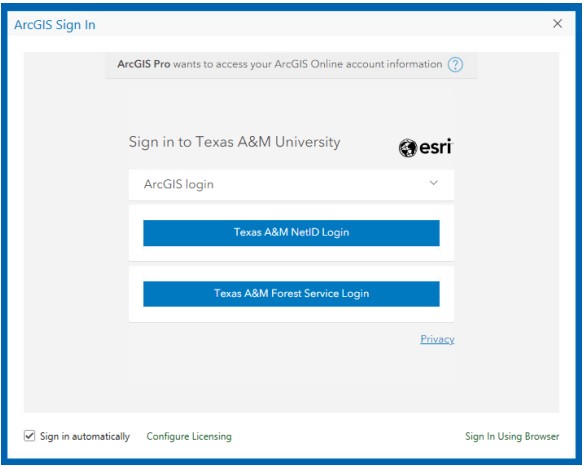
This will take you to the Typical CAS Authentication Page from TAMU. Login with your NetID and NetID Password.
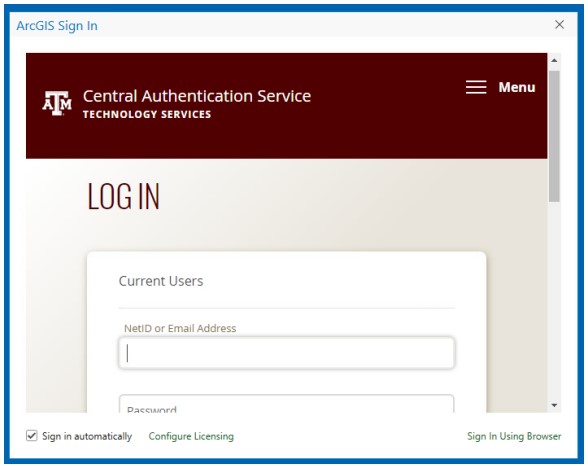
Once you login, you will be presented with the ArcGIS Pro application with your ArcGIS Online Account.
ArgGIS Online:
- Use ArcGIS Online, by going to the URL: https://tamu.maps.arcgis.com
- Log in with your ArcGIS Online account you just created above at the beginning of this document.
- Click on the “Texas A&M NetID Login”
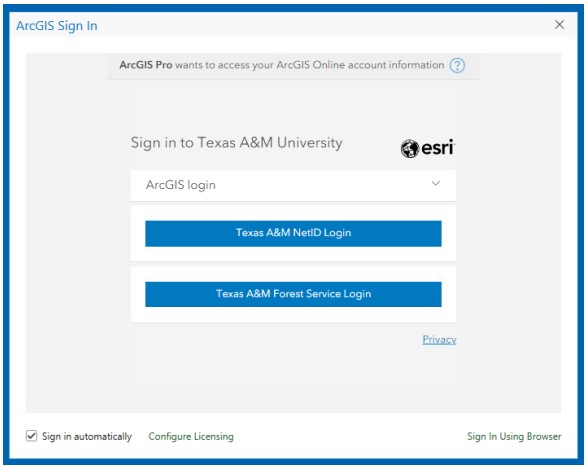
- You will be prompted to log in with your NetID and then you will have access.
Using the Virtual Desktops (VDI) to access ArcGIS
- Go to Desktop.tamug.edu
Pick ArcGIS Desktop
A Desktop shortcut to that Online portal has been placed on the VDI Desktops.This will let you allow you to create your online ArcGIS account. - Once you have your Esri ArcGIS online account setup.
- Open ArcGIS Pro application on the VDI desktop.
- Then click on the “Texas A&M NetID Login”
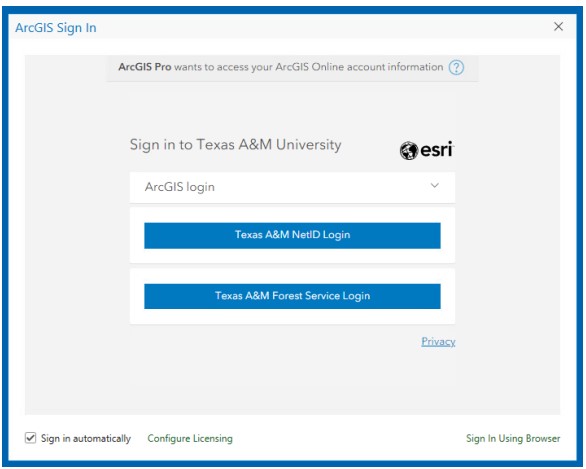
- Log in with your NetID and password on the CAS Authentication Page from TAMU.
- Once logged in, the ArcGIS Pro application will open with your ArcGIS account